|
Administrators
Developers
Articles
Cookbook
edit
|
Installing the Porcupine CGI Connector on IIS
- First download the latest CGI connector from Porcupine Connectors download page.
- Unzip the archive inside the IIS root folder (this is usually the "C:\inetpub\wwwroot" folder).
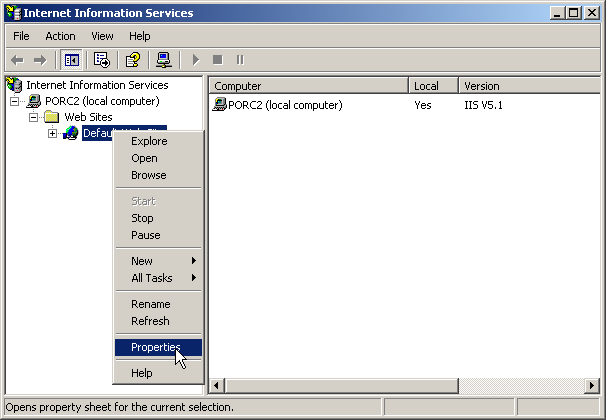
- Open the IIS management console, by opening the Windows control panel and selecting "Administrative Tools" and then "Internet Information Services".
- Select the default web site and open its properties dialog.
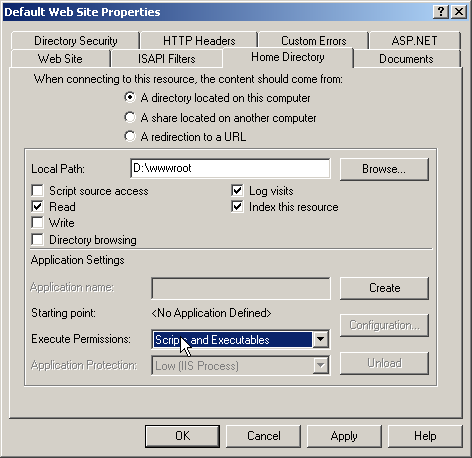
- Activate the "Home Directory" tab, locate the "Execute permissions" setting and select "Scripts and Executables". Then close the dialog by pressing the "OK" button.
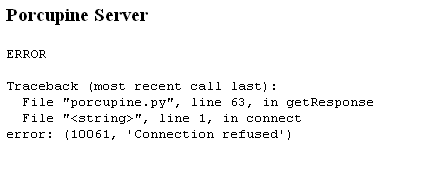
- Open a browser. In the address bar type "http://localhost/porcupine.exe". If you have installed Porcupine before the CGI connector then you should see the Porcupine login dialog. Otherwise if you see the following message then you have installed the connector successfully:
|